Trial a Mira sample
& Set up your Dashboard
Schedule a meeting with our team to set up your Mira sample trial. Experience Mira firsthand, whether for yourself or with a patient. Maximize your trial period by exploring the tips and tricks provided on this page.
1. Meet with our team
Speak to one of our experts to understand what Mira is, how it can help your patients, and how you can become a partner.
2. Testing & Dashboard set up
Try a sample for yourself or a patient and set up your Mira Dashboard to connect and analyze your patient's data (with patients' consent).
3. Choose a partnership
Explore how Mira can be incorporated into your practice. Choose a partnership option (up to 35% in earnings) & sign up as a Mira Partner.
4. Grow your expertise
Expand your knowledge by getting access to monthly webinars and case studies. Plus, get 1:1 support from our Medical Affairs Specialist.
Testing instructions
Using Mira is easy. To help you test correctly, or to guide your patient in doing so,
we've summarized the instructions for you here.
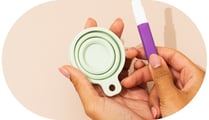
1. Sample Collection
Use first morning urine for best results. Wait at least 4 hours between voids. For later testing, hold urine for 4 hours and limit oral intake for 2 hours before testing. Test at the same time each morning. Limit fluid intake to less than 100 ml before bedtime and during the night. Test your urine sample immediately and keep it until a successful result is obtained.
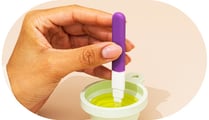
2. Dipping Method
Dip the wand up to the “max” line for exactly 20 seconds.
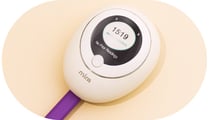
3. Analyzing Process
Apply and secure the cap. Insert the capped wand into the analyzer. Place the analyzer on a flat surface and do not move it. Analysis takes 16-21 minutes.
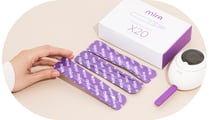
4. Equipment Storage
Store the analyzer and wands in a cool, dry place. Avoid moisture, heat, or freezing.
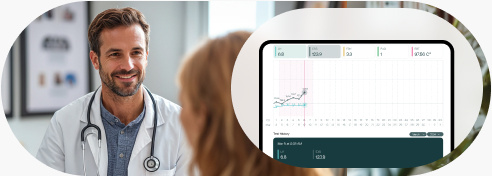
Set up your Mira dashboard. Our two-sided platform,
optimized for patient-provider collaboration.
Our Mira dashboard is designed to help practitioners efficiently monitor hormone levels, track treatment progress, and summarize data through exporting reports. It serves as a central hub where you can review patient information for ongoing remote monitoring.
How to Use the Dashboard:
- Login and Setup: Begin by accessing the administrative credentials you received via email from us and logging into the dashboard. From there, you can set up your clinic account.
- Patient Management: Patients can add themselves by scanning your unique QR code or clicking on your link. When trialing the sample, try scanning your own QR code to add yourself to the dashboard.
- Data Analysis and Reporting: You can review patients hormone charts, cycle summaries, and personalized thresholds. Use the dashboard to compare individual patient data with broader trends, generate detailed reports, and upload them to EMR systems.
Access our instructions document for a step-by-step guide on setting up your account, managing patient data, generating reports, and more. It includes links to video tutorials that walk you through key processes, making it easy to get started and make the most of the dashboard's features.